Hey fellow friends. This is Sacred with my first ever guide. Why I choose to write about PoTM is simple because of the fact that Dota SG lacks PoTM guides. I will try to make this guide as detailed and as simple to understand. Criticisms are always welcomed. Without further ado, I shall start.

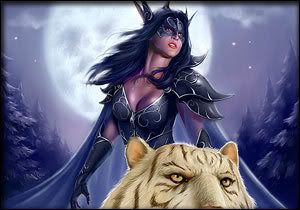
Mirana Nightshade - Priestess of the Moon
Range: 600 | Move Speed: 300
Primary: AGI
Str: 17 + 1.85 | Agi: 20 + 2.75 | Int: 17 + 1.65
Damage: 38 - 49 | HP: 473 | Mana: 221
HP Regen: 0.76 | Mana Regen: 0.69
Attack Speed: 1.14 | Armor: 1
Range: 600 | Move Speed: 300
Primary: AGI
Str: 17 + 1.85 | Agi: 20 + 2.75 | Int: 17 + 1.65
Damage: 38 - 49 | HP: 473 | Mana: 221
HP Regen: 0.76 | Mana Regen: 0.69
Attack Speed: 1.14 | Armor: 1
A matriarch and high priestess of Elune`s blessed order, Mirana Nightshade serves as a light in darkness for the front line of the Sentinel ranks, raining arrows and falling stars alike upon the shambling undead masses of the Undead Scourge, while her very presence is said to be so holy that it melts away the fatigue of nearby allies, giving them greater haste on the battlefield. In times of need however, she can fade herself and others around her into the safety of invisibility, making her a potent supporter matched by few.

Starfall™
Calls down a wave of meteors to damage each nearby enemy. If enemy is farther than 600 range, it has a 60% chance to still hit him. One random enemy unit within 200 aoe will get hit again for half the damage.
Level 1 - 75 damage per wave.
Level 2 - 150 damage per wave.
Level 3 - 225 damage per wave.
Level 4 - 300 damage per wave.
Cooldown: 12 seconds.
Author’s Remarks: Your bread and butter move. You will use this primarily for harassing and farming. It can also be used to initiate battle. Starfall and Radiance are quite a pair in farming.

Elune's Arrow™
Fires an arrow to a location with deadly precision, dealing large damage and stunning the first unit it strikes. Stun duration increases based on how far the target is, ranging from 0.5 to 5 seconds.
Level 1 - Deals 90 damage.
Level 2 - Deals 180 damage.
Level 3 - Deals 270 damage.
Level 4 - Deals 360 damage.
Cooldown: 25 seconds.
Author’s Remarks: This is what makes me love POtM. If you successfully hit an opponent with arrow, he is a good as dead. Imagine a 5 secs stun. You can dismember him anyway you want. Of course, this takes practice to master but once you master it, you will be an asset to your team and a threat to the opponents. Aiming this is almost the same as Pudge’s hook. Only thing, Pudge’s hook flies faster ( I think ). More on this later.

Leap™
Mirana's wild Frostsaber leaps forward into battle, empowering allies with a ferocious roar upon landing. Movement and Attack Speed bonus lasts 10 seconds.
Level 1 - 400 range. 4% speed increase.
Level 2 - 450 range. 8% speed increase.
Level 3 - 500 range. 12% speed increase.
Level 4 - 550 range. 16% speed increase.
Cooldown: 20 seconds.
Author’s Remarks: One of two escape tools you have. The key is to be sure where you want to Leap to and look at that direction. I have seen many n00bs on BNet, in the heat of battle, they leap straight into their opponents and get owned. Also, when you leap, you are invulnerable. But if you get ruptured, don’t think of leaping as you will take damage ( Someone clear this for me ). Apart from the range, you get a movement speed bonus aura that will benefit both you and your allies. A 16% increase may seem negligible but trust me, it is significant.

Moonlight Shadow™
Turns Nightshade and all allied heroes invisible. If Invisiblity is broken, it gets restored after the fade time during the shadow duration.
Level 1 - Lasts 7 seconds. 2.5 second fade time.
Level 2 - Lasts 9 seconds. 2 second fade time.
Level 3 - Lasts 11 seconds. 1.5 second fade time.
Cooldown: 160 seconds.
Author’s Remarks: Your ultimate. Finally a skill in DoTA that makes all allies invisible. Most of the time ( about 9/10 times ), I have seen this being used only defensively. This can work wonders if used offensively. Imagine 5 opponents pushing mid and suddenly 5 heroes pop around you. By the time they realize what happens, chances are, they are dead. More on this later.
PROS: Have 2 escape skills ( Can leap into fray, kill and windwalk away)
Can farm extremely well
Early game harasser, late game damage dealer
360 damage stun that can stun up to 5 secs
CONS: Low HP
Low Mana
Maybe target for ganks
Most importantly, Very Item-Dependent
As you can see, the cons can be easily remedied with cheap equipment such as bracers, nulls and observer wards. Also, if you can farm properly, items shouldn’t be a problem. As such, there is absolutely no reason why you should not play POtM.
The Skill Build
Level 1 - Starfall
Level 2 - Leap
Level 3 - Starfall
Level 4 - Elune's Arrow
Level 5 - Starfall
Level 6 - Elune's Arrow
Level 7 - Starfall
Level 8 - Elune's Arrow
Level 9 - Elune's Arrow
Level 10 - Moonlight Shadow
Level 11 - Moonlight Shadow
Level 12 – Leap
Level 13 - Leap
Level 14 - Leap
Level 15 - Stats
Level 16 - Moonlight Shadow
Level 17-25 – Stats
Reason for Skill Build : This should be the standard POtM build, no matter what equipment you choose. Starfall early for harassing. One level of Leap is learnt for sticky situations. Arrow for the much needed stun. Moonlight Shadow is learnt later as you wont have mana to use it. The rest is all logical.
Item Build
Starting Items


Early Game Items


Finishing Items


Explanation of item build:
Stout shield is gotten as starting item for vanguard later. Circlet for your null or bracer and clarity for your early game mana usage.
Now comes the fun part. WHY THE HELL DID I CHOOSE VANGUARD? After experimenting with different builds, I found out vanguard works wonders on PoTM. First of all, you got low life. Vanguard more than covers that It also gives you life regeneration. Also consider this situation. You are hundred gold more to complete an item but you are low on life. Vanguard covers that and you can battle neutral without fear. Vanguard can also help you out in farming as you can tank a bit. If you are still not convinced, PoTM gets vanguard for the same reason Viper gets vanguard. Lets move on. You can opt for 2 bracers, 2 nulls or one of each. I personally feel one of each is sufficient.
Now the final build. I understand its quite hard to obtain the items in a standard game. By the time you build up radiance, game should have ended. In the rare event it has not ended though, feel free to complete. OK. First of all, lets discuss Desolator. To understand why you should get Deso, you must understand the following statement:
PoTM is a early game caster, later game damage dealer.
Now if you understand that statement, you will agree with my item build. While your starfall and arrow are sufficient early game, it lacks fire power late game. As such, PoTM transforms in to a damage dealer. Also, remember you are damage dealer like Clinkz and not a tanker. You should stay back and fight. More on this later in the Walkthrough. Desolator is your first item to get your holy shit. I am aware a simple platemail will negate the minus armour. Nevertheless, raw fire power is enough. This coupled with MKB will make you be feared in the battlefield. Radiance is gotten for farming and the evasion. By now, within a few hits, opponents would be dead. To complete the build, finish Buriza and jump in joy seeing the ever so frequent red numbers.
Optional Items:

Empty Bottle
Empty bottle can be bought seeing it as an investment. With your low HP and Mana, Bottle is a worthy choice. I exclude this from my build as this will delay the time you can complete vanguard.

Arcane Ring
You can get this if you want but I advice against it because of the same reason I have given for the Bottle.

Linken’s Sphere
I can actually see this in my item build if you plan to go defensive a little. If you want to get this, get this instead of Buriza and get it after your Deso.

Observer Wards
If your teammates are the type who do not say heroes are missing or if you want to be extra careful, get these. Plant them at river exits, behind trees and rune areas.

Heart of Tarasque
A tempting item indeed. It covers nicely for your lack of HP. Also an added 11 HP/Sec regen doesn’t hurt. As you would have guessed, If you are getting this item get this instead of Buriza. What if your Buriza slot is already taken by Linken’s Sphere? Get this instead of Radiance in that case. No matter what, Desolator and MKB mustn’t be separated. They are a pair made in heaven. They work hand in hand to get you your kills. * Note * : I recommend that if you get Linken’s, skip this or vice versa. I believe going too defensive isn’t good, especially for a hero like PoTM who is item-dependent.
Items Not to Get:

Black King Bar
Black King Bar is exactly the same as MoM. Why u ask? MoM is a double edge sword. Ditto for BKB. How many countless time you see a Naix avartar but no one runs? Any good team will stay and fight the Naix. He would be dead before he can say “ Oh Shit ”. Now imagine PoTM with BKB. She leaps in and screams “ Kosmorton!!”. On top of that, she expands in size. Almost immediately, your life will start to drop. And seeing that your life is not remarkably huge, you will be dead. There is also a Clinkz guide here, in the premium guides section I think, that says BKB is a must for Clinkz. I agree to a certain extend. You can pick of lone hero's like CM at ease seeing they cant stop you with Avartar. But Avatar doesen't help you in team battles. You, as a fragile but good damage dealer, should stand back and shoot. Not get into the thick of the action. I think my reasons are sufficient enough and I will not discuss further in this matter.
CONTINUED
Any ORB-EFFECT items


The reason is simple. Orb effects do not stack. I believe desolator is a better choice for PoTM than these items.
Now we got those out of the way, we can look at the Walkthrough.
How to use PoTM’s Abilities:
Starfall- (1) Harassment— Really good at softening up opponents
early in the game
(2) Finisher- Can be used to finish opponents
(3) Farming- Farming is a breeze. Just press ‘T' and
watch.
Elune’s Arrow- (1) Stun- Duh.
(2) Nuke- If Pudge has hook, You have this.
360 dmg!!!
(3) Catch feeling opponents- Just aim at
at direction
He is heading to and watch
Your arrow hit.
Leap- (1) Escape- Like another Duh.
(2) Speed Boost Aura- Secondary purpose. Mainly for
escape.
Moonlight Shadow- (1) Escape- The third Duh. Your second escape.
But be warned. Casting it too late
May be fatal.
(2) Ambush- Let your opponents push, cast
Moonlight and backstab them
Gameplay Walkthrough
Level 1- 11
When you start, grab your stout shield, circlet and clarity pot and head top for Sentinel and bottom for Scrouge as they are nearer the Secret Shop. I would prefer a partner as your skills can mix well with your allies. As with any other damage dealer, your job early game is to farm. Her range is great (600). Use that to your advantage and harass opponents who come in for last hits. Do last hits yourself and farm for your Vanguard. If you are unlucky and chance upon nukers, play defensive until at least you have obtained you Ring of Health. Once you are around Level 7 or 8, and see heroes with less than half life, you can hunt them. Remember to have enough mana to pull of your combo. Hide behind the tree. Let them leave the comfort zone of their towers. Another important point to note is that the hero should be alone for this to work effectively. Notice their mana. If they have almost none to use any skills, they are food for your tiger. Once they do not have protection of the tower, aim properly at the hero and leap. Starfall straight away and start hitting. Most of the time, with level 4 starfall, they should die. In the rare occasion they have not died, chase and stun. 99 % of the time they will be dead. If they are not dead, DO NOT, I repeat, DO NOT bother chasing. Tower can be a real menace to you with your low life. The tide of the battle can easily be turned and the hunter will be the hunted. Be happy he have left, warn your team mates hero missing, and start farming.
Mid Game
Level 11-16
This is where you can start to hunt. By this time you should be finishing Desolator. This is the time Ultimates are at level 2. You should be as defensive as you are offensive. Hunt with your team mates. Anything goes wrong, use Moonlight and start running. One thing to note about your Moonlight. If you want to use it, use it early and not at the last moment. Remember your windwalk have a fade time unlike Bone’s or Bounty Hunter’s windwalk. This is also the phase of the match where your role from caster shifts to damage dealer. Always remember. Strength lies in numbers. Ambush together. Or if the hero is weak enough with no natural escape abilities such as Zues or Sniper, feel free kill them alone. But be aware of baits. Zues and Sniper are typical baits. If you sense everyone is missing and a half HP Zeus is farming alone at top, do not bother hunting him down. Always remember to Play Smart.
Late Game
Level 16-25
This part of the game is Pushing, Pushing and more Pushing. As always, stick to your allies and push. Your MKB should be completed or even Radiance can be finished. Spam starfall to clear creeps. They should be down in mere seconds with Radiance. If opponents offer weak resistance, crush them and continue on your path. If something goes wrong and your only tanker is dead for some reason, Moonlight and save the rest of your teammates. Without a tanker, you are food for the opponents. Remember to stay back and shoot and not be a front line fighter. At this part of the game, lone heroes are can be killed within a few hit, even for strength heroes. When you are defending your tower at base, use Moonlight out of sight and walk behind them with your allies. After this, throw all your combos at them. 75% of the time, your team should triumph and be quick on the counter attack.
Best Allies


If you have 2 or more of these heroes with a PoTM, consider the match won. How you ask? Just moonlight, walk behind them, and wreck havoc. A whole team of 5 may be down in under 10 secs.
Any ORB-EFFECT items
The reason is simple. Orb effects do not stack. I believe desolator is a better choice for PoTM than these items.
Now we got those out of the way, we can look at the Walkthrough.
How to use PoTM’s Abilities:
Starfall- (1) Harassment— Really good at softening up opponents
early in the game
(2) Finisher- Can be used to finish opponents
(3) Farming- Farming is a breeze. Just press ‘T' and
watch.
Elune’s Arrow- (1) Stun- Duh.
(2) Nuke- If Pudge has hook, You have this.
360 dmg!!!
(3) Catch feeling opponents- Just aim at
at direction
He is heading to and watch
Your arrow hit.
Leap- (1) Escape- Like another Duh.
(2) Speed Boost Aura- Secondary purpose. Mainly for
escape.
Moonlight Shadow- (1) Escape- The third Duh. Your second escape.
But be warned. Casting it too late
May be fatal.
(2) Ambush- Let your opponents push, cast
Moonlight and backstab them
Gameplay Walkthrough
Level 1- 11
When you start, grab your stout shield, circlet and clarity pot and head top for Sentinel and bottom for Scrouge as they are nearer the Secret Shop. I would prefer a partner as your skills can mix well with your allies. As with any other damage dealer, your job early game is to farm. Her range is great (600). Use that to your advantage and harass opponents who come in for last hits. Do last hits yourself and farm for your Vanguard. If you are unlucky and chance upon nukers, play defensive until at least you have obtained you Ring of Health. Once you are around Level 7 or 8, and see heroes with less than half life, you can hunt them. Remember to have enough mana to pull of your combo. Hide behind the tree. Let them leave the comfort zone of their towers. Another important point to note is that the hero should be alone for this to work effectively. Notice their mana. If they have almost none to use any skills, they are food for your tiger. Once they do not have protection of the tower, aim properly at the hero and leap. Starfall straight away and start hitting. Most of the time, with level 4 starfall, they should die. In the rare occasion they have not died, chase and stun. 99 % of the time they will be dead. If they are not dead, DO NOT, I repeat, DO NOT bother chasing. Tower can be a real menace to you with your low life. The tide of the battle can easily be turned and the hunter will be the hunted. Be happy he have left, warn your team mates hero missing, and start farming.
Mid Game
Level 11-16
This is where you can start to hunt. By this time you should be finishing Desolator. This is the time Ultimates are at level 2. You should be as defensive as you are offensive. Hunt with your team mates. Anything goes wrong, use Moonlight and start running. One thing to note about your Moonlight. If you want to use it, use it early and not at the last moment. Remember your windwalk have a fade time unlike Bone’s or Bounty Hunter’s windwalk. This is also the phase of the match where your role from caster shifts to damage dealer. Always remember. Strength lies in numbers. Ambush together. Or if the hero is weak enough with no natural escape abilities such as Zues or Sniper, feel free kill them alone. But be aware of baits. Zues and Sniper are typical baits. If you sense everyone is missing and a half HP Zeus is farming alone at top, do not bother hunting him down. Always remember to Play Smart.
Late Game
Level 16-25
This part of the game is Pushing, Pushing and more Pushing. As always, stick to your allies and push. Your MKB should be completed or even Radiance can be finished. Spam starfall to clear creeps. They should be down in mere seconds with Radiance. If opponents offer weak resistance, crush them and continue on your path. If something goes wrong and your only tanker is dead for some reason, Moonlight and save the rest of your teammates. Without a tanker, you are food for the opponents. Remember to stay back and shoot and not be a front line fighter. At this part of the game, lone heroes are can be killed within a few hit, even for strength heroes. When you are defending your tower at base, use Moonlight out of sight and walk behind them with your allies. After this, throw all your combos at them. 75% of the time, your team should triumph and be quick on the counter attack.
Best Allies
If you have 2 or more of these heroes with a PoTM, consider the match won. How you ask? Just moonlight, walk behind them, and wreck havoc. A whole team of 5 may be down in under 10 secs.
CONTINUED ( because of image restrictions)
Worst Enemies

The NO.1 enemy to almost any hero in DoTA, the anti mage can really screw you. Early game, he may be food for you but late game, you are food for him. First, he burns all your mana in seconds. You cant leap and Moonlight. If you stay and fight, it comes down to DPS. Your DPS is really high late game but his natural attack speed is higher than you. Even if he is about to die, he just blinks away.
Counter: The moment you see him alone, Moonlight away to safety. Sadly that’s the only counter you have for him. Or you could ask your team to mass Guinsoo. If that’s the case, he should be really pissed and leave quite soon.

He can really hurt your early game play. A simple stun + toss combo is enough to kill you early game. Late game, he stun and toss, you still take considerable damage.
Counter: Early game, request for ganks. Late game, you can eat him for lunch as by the time he reaches you, he should be dead. If he gets dagger, it will be a bit of problem but nothing PoTM cant handle I bet.
Definitely on the Top 5 feared list for the PoTM, as a matter of fact, any hero. He time walks in, chronosphere, and seconds later you are dead. Yup. Thats sad reality.
Counter: DO NOT LET HIM FARM AT ALL EARLY GAME. Assign team mates to scout neutral creep positions or use observer wards. You should keep ganging him early game if you want to survive late game.

The Mana burner. He burns your mana a little at a time leaving you at his mercy. However, he is a threat only early to mid game.
Counter: If you have him in your lane, request for lane change. Also don’t let him farm. A well fed NA with dagon is more than a threat for you.
Conclusion
Finally I am finished with this guide. I will add screenshots later. Also this guide is a little uncompleted ( How to use your Skills etc.). I will update this soon enough. Cheers!!
Worst Enemies
The NO.1 enemy to almost any hero in DoTA, the anti mage can really screw you. Early game, he may be food for you but late game, you are food for him. First, he burns all your mana in seconds. You cant leap and Moonlight. If you stay and fight, it comes down to DPS. Your DPS is really high late game but his natural attack speed is higher than you. Even if he is about to die, he just blinks away.
Counter: The moment you see him alone, Moonlight away to safety. Sadly that’s the only counter you have for him. Or you could ask your team to mass Guinsoo. If that’s the case, he should be really pissed and leave quite soon.
He can really hurt your early game play. A simple stun + toss combo is enough to kill you early game. Late game, he stun and toss, you still take considerable damage.
Counter: Early game, request for ganks. Late game, you can eat him for lunch as by the time he reaches you, he should be dead. If he gets dagger, it will be a bit of problem but nothing PoTM cant handle I bet.
Definitely on the Top 5 feared list for the PoTM, as a matter of fact, any hero. He time walks in, chronosphere, and seconds later you are dead. Yup. Thats sad reality.
Counter: DO NOT LET HIM FARM AT ALL EARLY GAME. Assign team mates to scout neutral creep positions or use observer wards. You should keep ganging him early game if you want to survive late game.
The Mana burner. He burns your mana a little at a time leaving you at his mercy. However, he is a threat only early to mid game.
Counter: If you have him in your lane, request for lane change. Also don’t let him farm. A well fed NA with dagon is more than a threat for you.
Conclusion
Finally I am finished with this guide. I will add screenshots later. Also this guide is a little uncompleted ( How to use your Skills etc.). I will update this soon enough. Cheers!!


No comments:
Post a Comment